Introduction:
The mobile application development landscape is filled with numerous ways to build a mobile app. And the most popular one among them is – native iOS.
You can create native iOS apps using Objective-C or Swift language. Unlike Android, the iOS operating system has closed source code, it is created exclusively for Apple’s hardware. In the iOS platform, to develop native mobile apps then first you need a Mac device.
Apple has many excellent tools and resources, you can use that for developing iOS apps such as:
a. iOS SDK: To integrated with the Cocoa Touch UI framework
b. XCode: It’s the official IDE for iOS development
c. Swift Playgrounds: It’s a learning platform for Swift development
d. TestFlight: It’s a beta testing app
iOS also has a remarkable third-party ecosystem with well-known developer tools, i.e. AppCode and CodeRunner. App Store can reject your iOS app for numerous reasons from poor performance to security issues to the lack of valuable content, their review guidelines are quite strict.
Creating a New Project:
You’ll want to create a new project, then you need Xcode, so first, you have to install Xcode. Then open Xcode in the /application directory. Then click “Create a new Xcode project” from the welcome screen or choose File >> New >> Project in the menu. Then select “iOS” at the top of the dialog and in the application section, select “Single View App”, then click “Next”.
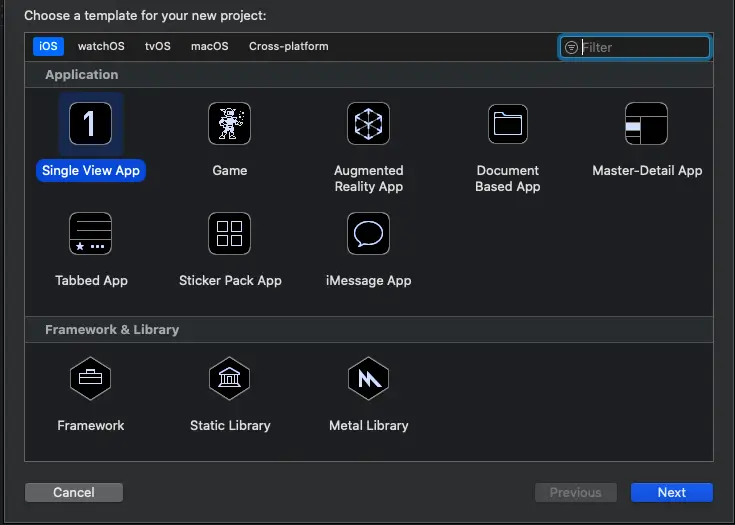
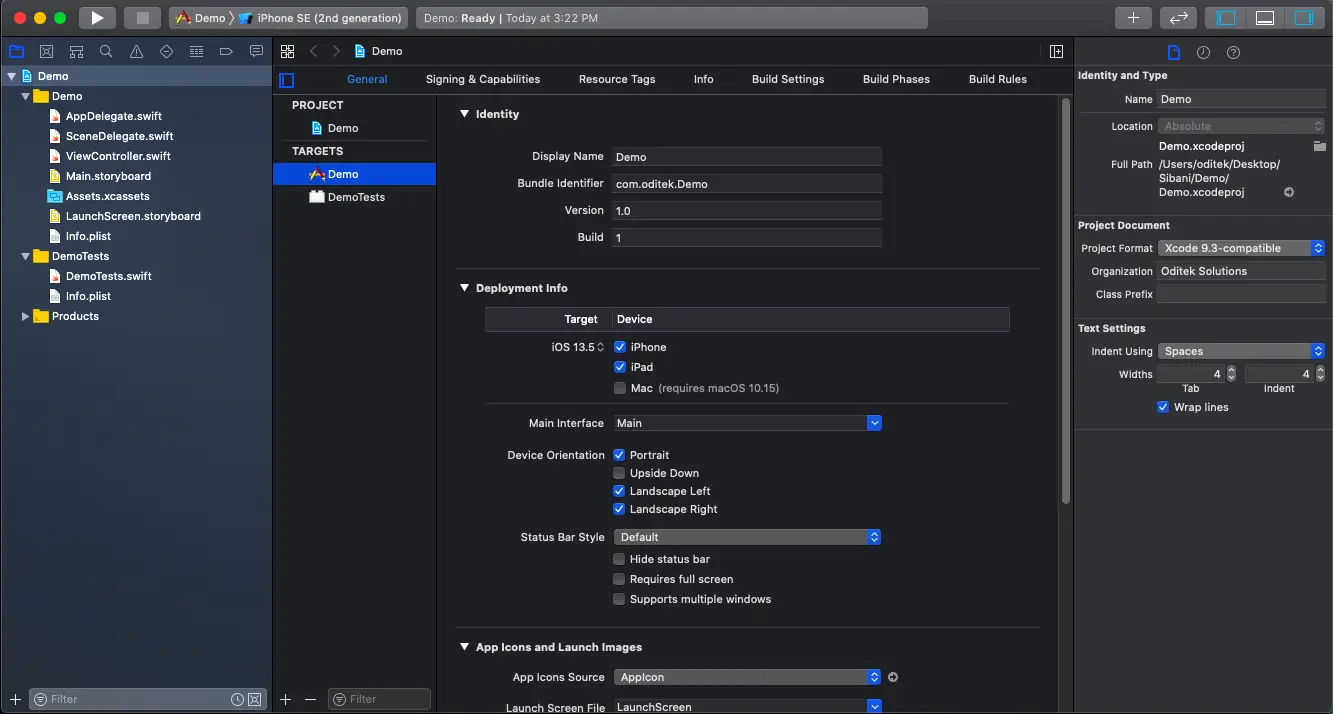
Then you will be presented with a dialog to enter some basic information about your application:

Then click “Next”. In the dialog that appears, select a location to save your project & click “Create”. Then Xcode opens your new project in the workspace window.
The App Delegate Source File:
Whenever you create a new project, the AppDelegate class is automatically created. Xcode provides this class to initialize your app and respond to app-level events unless you are doing something highly unusual. The AppDelegate class adopts the UIApplicationDelegate protocol, it defines several methods that you use to set up your app, to respond to the app’s state changes, and to handle other app-level events.
The AppDelegate class contains a single property: window.
var window: UIWindow?
This property stores a reference to the app’s window and the window represents the root of your app’s view hierarchy, where all of your app content is drawn. Note that the window property is optional, so it may have no value (be nil) at some point.
The AppDelegate class also contains stub implementations of the following delegate methods:
1. func application(_ application: UIApplication, didFinishLaunchingWithOptions launchOptions: [UIApplicationLaunchOptionsKey: Any]?) -> Bool
2. func applicationWillResignActive(_ application: UIApplication)
3. func applicationDidEnterBackground(_ application: UIApplication)
4. func applicationWillEnterForeground(_ application: UIApplication)
5. func applicationDidBecomeActive(_ application: UIApplication)
6. func applicationWillTerminate(_ application: UIApplication)
These methods of the application object communicate with the app delegate. During an app state transition (for example: app launch, transitioning to the background, and app termination), the application object calls the corresponding delegate methods, gallowing your app to respond. To make sure these methods get called at the correct time, you don’t need to do anything special, the application object handles that job for you.
The View Controller Source File:
The Single View Application template has another source code file, i.e. ViewController.swift. Select the ViewController.swift file in the project navigator to view it.
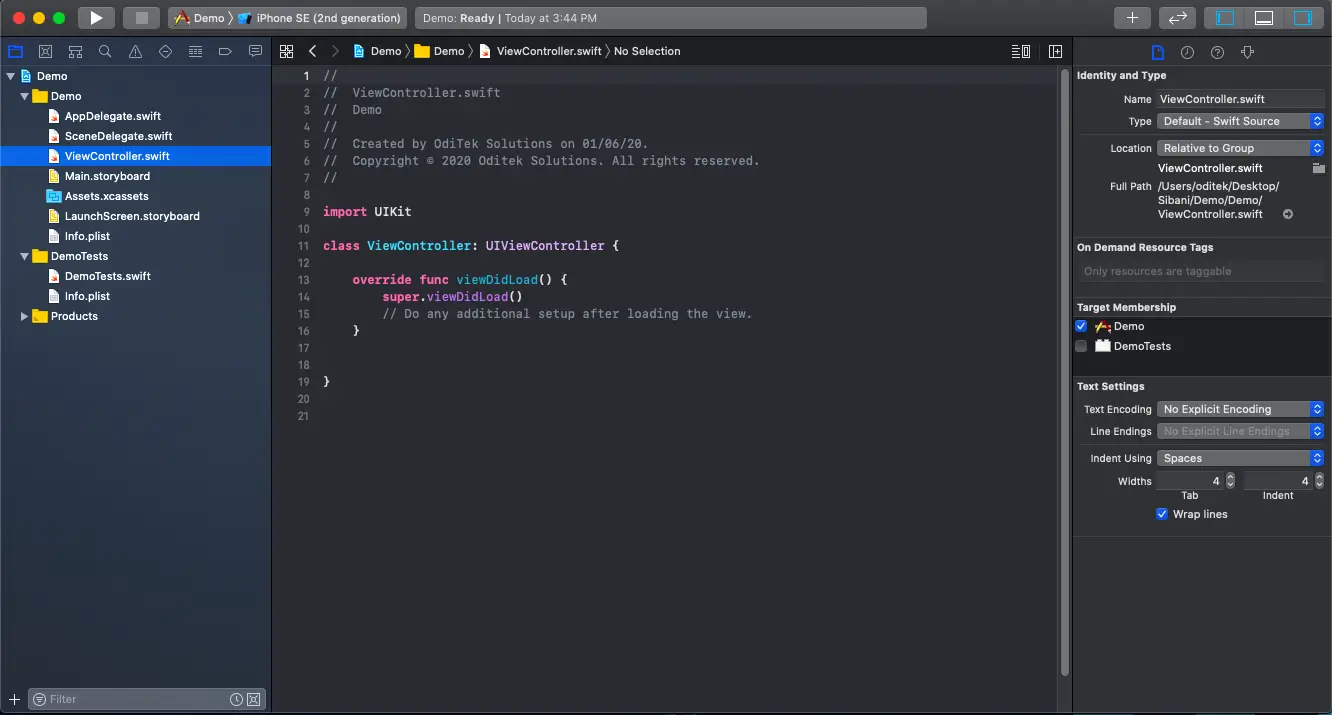
This file defines a custom subclass of UIViewController named ViewController, it simply inherits all the behaviour defined by UIViewController. To override or extend that behaviour, you can override the methods defined on UIViewController.
Open Your Storyboard:
Now you’re ready to start working on a storyboard for your app. The storyboard is a visual representation of the app’s user interface, showing screens of content and the transitions between them. You use storyboards to layout the flow or the story that drives your app. You can see exactly what you’re building while you’re building it, to get immediate feedback about what’s working and what’s not, and make instantly visible changes to your user interface.
To open your storyboard
In the project navigator, select Main.storyboard.
Xcode opens the storyboard in Interface Builder. In the editor area, its visual interface editor. The background of the storyboard is the canvas, it is used to add and arrange user interface elements.
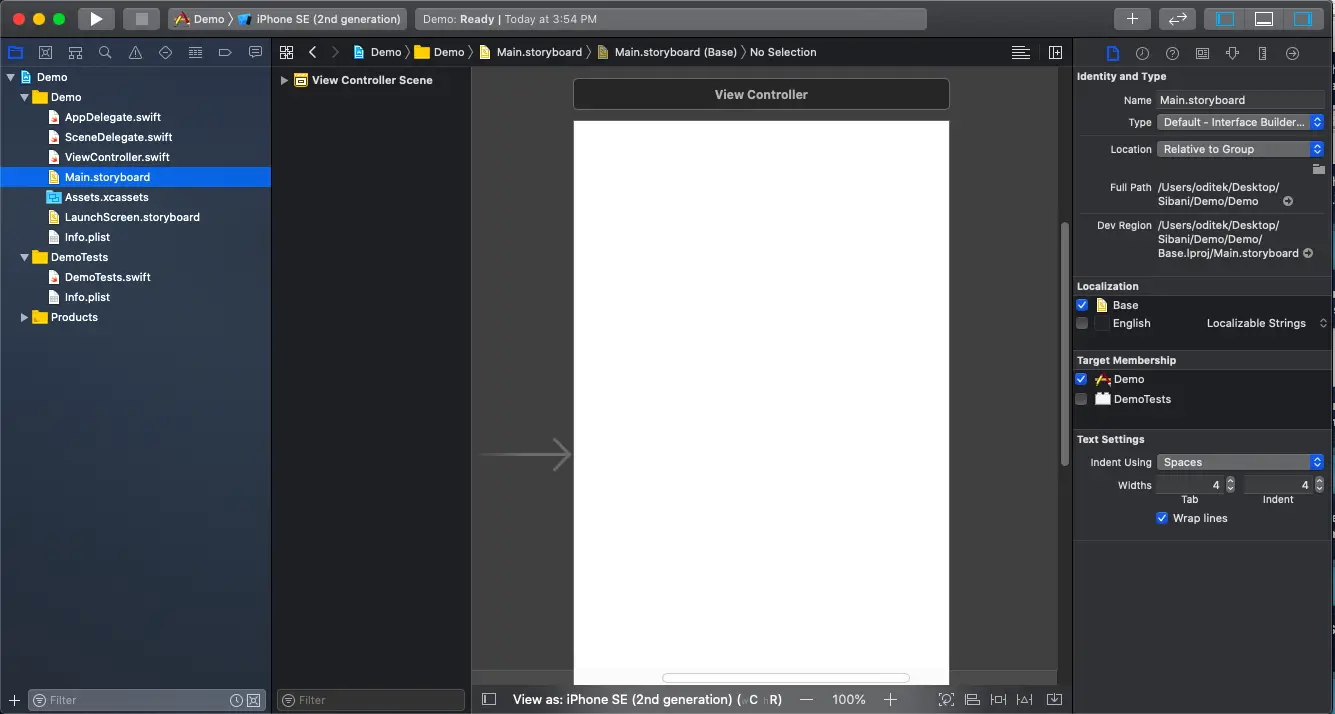
In your app, the storyboard contains one scene, which represents a screen of content in your app. On the left side of the scene on the canvas one arrow will present, that points to the storyboard entry point, which means that this scene is loaded first when the app starts, it contains a single view that’s managed by a view controller.
Build the Basic UI:
Xcode provides a library of objects, you can add that to a storyboard file. Some of these are elements that appear in the user interface, i.e. buttons and text fields.
The elements that appear in the user interface are known as Views (display content to the user). In your user interface, they are the building blocks for constructing and presenting your content in a clear, elegant, and useful way, and the views have a variety of useful built-in behavior, including displaying themselves onscreen and reacting to user input.
To add a text field to your scene:
1. Choose Editor > Canvas, and make sure that Show Bounds Rectangles is selected.
In Interface Builder, this setting causes a blue bounding box to be drawn around all the views on the canvas. Many views and controls have transparent backgrounds, making it difficult to see their actual size, and the Layout bugs occur when the system resizes a view so that it’s either larger or smaller than you anticipate. Enabling this setting helps you to understand exactly what’s going on in your view hierarchy.
2. Open the Object library:
It appears at the bottom of the utility area on the right side of Xcode. If you don’t see the Object library, then click its button, which is the third button from the left in the library selector bar or choose View > Utilities > Show Object Library.
3. In the Object library, the type text field in the filter field it quickly finds the Text Field object.
4. Drag a Text Field object from the Object library to your scene, so that it’s positioned in the top half of the scene and aligned with the left margin in the scene. If the text field snaps to the left margin, then Stop dragging.
Preview Your Interface:
In your app, preview periodically to check that everything is looking the way you expect. In your app interface, you can preview using the assistant editor, which displays a secondary editor side-by-side with your main one.
To preview your interface:
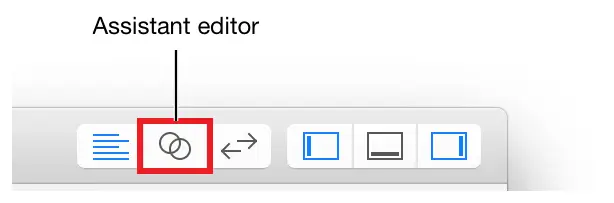
1. In the Xcode toolbar, Click the Assistant button near the top right corner of Xcode to open the assistant editor.
2. In the Xcode toolbar, click the Navigator and Utilities buttons to collapse the project navigator and utility area, if you want more space to work, and also you can collapse the outline view.

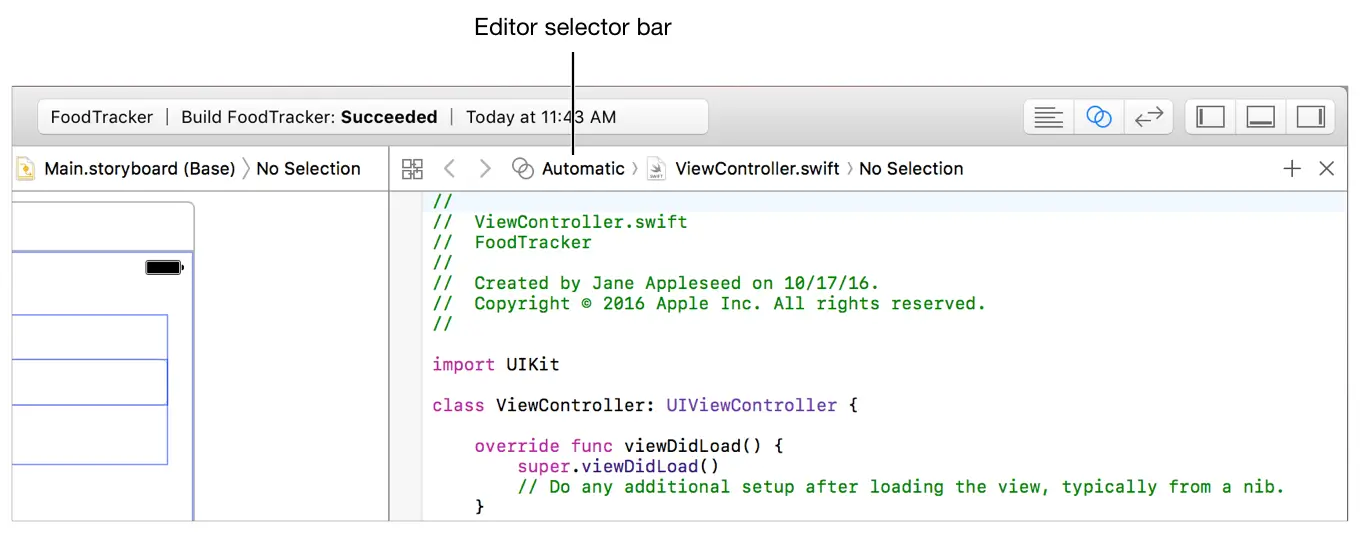
3. In the editor selector bar, which appears at the top of the assistant editor, switch the assistant editor from Automatic to Preview > Main.storyboard (Preview).
Associating Storyboards With Your Code:
In the storyboard objects to access from the code, you must define the relationships between them, and connecting items from the storyboard to your code via Xcode is not obvious if you’re used to other development environments. Before you can do this, first you can create a view controller to hold these associations. This can be done with the following steps:
1. Choose File >> New File
2. Choose “Cocoa Touch Class” Inside the dialog:
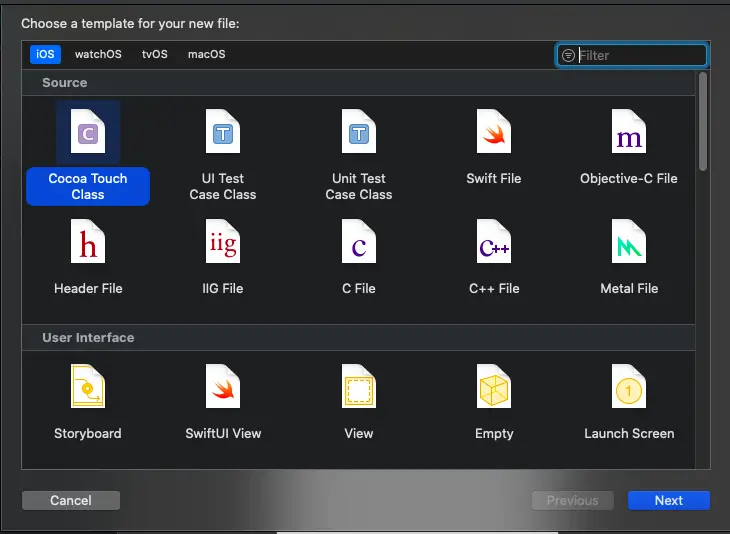
Then click “Next”.
3. In the next dialog, give your class name and ensure that it inherits from the subclass of UIViewController:
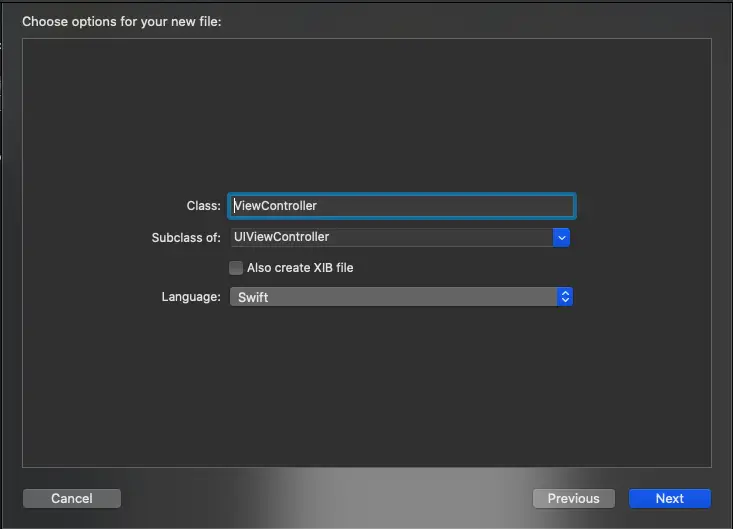
4. Then click “Next,” you’ll be asked to confirm where in the project the file should be saved. Picking the main directory of the app is fine for a simple project.
5. Then click “Create,” you’ll see that a new set of files has been created for your view controller. Now, the view controller in your storyboard is associated with that newly created view controller.
6. With the storyboard open, click on the view controller. Then click in the “Identity Inspector” panel, pick the “Class” that this view controller is to be associated with.
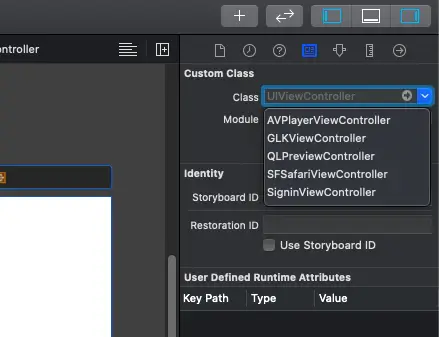
Once this process is completed, then the code for your view controller will be properly referenced by the storyboard entry.
To connect the textField to the ViewController.swift code:
1. In your storyboard, select the text field.
2. Then Control-drag from the text field on your canvas to the code display in the editor on the right, stopping the drag at the line just below the line “class ViewController: UIViewController {“
3. In the dialog, it appears for Name, so type “nameTextField”. Leave the rest of the options as they are, then click “Connect”.
@IBOutlet weak var nameTextField: UITextField!
If you plan to either access a value from the interface object or modify the interface object in your code then you need an outlet to an interface object. In this case, you need to set the text field’s delegate property and also you can set the label’s text property. But you won’t be modifying the button, so there’s no reason to create an outlet for it.
In your code, outlets let you refer to your interface elements, but you still need a way to respond whenever the user interacts with the elements, that’s where actions come in.
Define an Action to Perform:
You can create an action the same way you create an outlet: In your storyboard, Control-drag from a particular object to a view controller file, then this operation creates a method in your view controller file and that gets triggered when a user interacts with the object that the action method is attached to.
@IBAction func signinButtonAction(_ sender: UIButton) {
}
The sender parameter refers to the object that was responsible for triggering the action (a button), the IBAction attribute indicates that the method is an action that you can connect to from your storyboard in Interface Builder, and the rest of the declaration declares a method by the name of signinBtnAction(_:).
Running and Debugging an iOS Application:
When you are installed the Xcode and the iOS SDK, so is the iOS simulator, which simulates an iOS device directly on your machine. Xcode has a drop-down menu that allows you to select different device configurations and then pressing the “Run” button in the upper-left corner will build the app and then run it in the chosen simulator.

In the above using the menu, you can switch between iPhones and iPads of different sizes, as well as between Retina and non-Retina versions of each device.
Simply by clicking in the left margin of the code editor debugging is done, where the line numbers appear. The app will stop when the execution of your app reaches the breakpoint, and the variable values in effect at that moment in time will appear below the code editor:
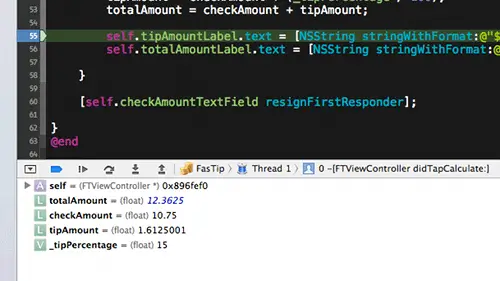
Some things, such as push notifications cannot readily be tested in the simulator, you will need to test on a device, which requires you to register as an Apple developer for $99 a year. Once you have joined, then you can plug in your device with a USB cable. Xcode will prompt you for your credentials and will offer to “provision” the device for you and once the device is recognized, it will be shown in the same menu that allows you to switch between device simulators.
In Xcode, by going to Window >> Organizer in the menu, then you can display a tool that enables you to manage all of the devices visible in Xcode and to examine crash logs and more, and the Organizer window also lets you take and export screenshots of your application.
Benefits of Native Mobile App Development:
1. Better Performance:
Native mobile apps directly interact with the native APIs without depending on middleware (such as plugins and WebViews). As there are some few dependencies, native mobile apps are faster and more responsive than hybrid apps, and this is especially important for performance-centric apps (like games and graphic-heavy applications).
2. Consistent look and feel:
As native mobile apps are developed using native SDKs (software development kits), then their UIs look consistent with their platform. As there are no discrepancies between the OS and app design, this ensures a better user experience.
3. Better compliance with app store guidelines:
Because of their architecture, native mobile apps comply better with app store guidelines. In 2017, Apple restricted its submission guidelines. Since then, they have begun to reject apps that rely too much on WebViews, such as Ionic View that allowed developers to test their Ionic applications. As it’s likely that app stores will continue cracking down on hybrid apps, native mobile apps are also a more future-proof investment.
Summary:
Thus far, we’ve seen the basics of developing a simple native iOS application. Most applications are more complex than this, but these are the basic building blocks:
1. Xcode: The development environment
2. Storyboards: For laying out and configuring the user interface
3. View controllers: Provide the basic logic for interacting with each of the views defined in the storyboards
4. Navigation controllers: Enable the user to navigate between the different views
For any further information, you can write to us at info@oditeksolutions.com.